Cinemodding Asahi Optics Takumar lenses
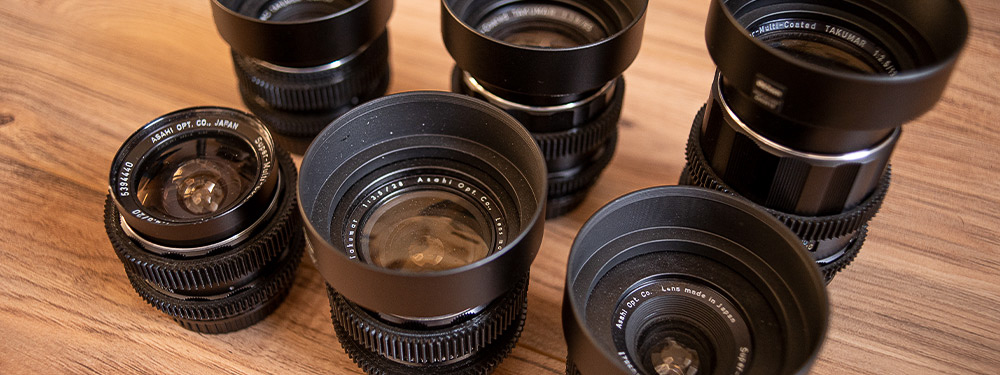
Takumar lenses were designed by Asahi Optics in Japan, they were branded 'Pentax' for the Western market. From the 60's on, Asahi Optics Pentax cameras were widely used among professionals as well as consumers. The cameras are well known for their TTL (Through The Lens) exposure metering and the great line of lenses that came with the cameras.
Throughout the past decades, Pentax lenses earned their status of being well-built, sturdy lenses with great performance in sharpness and contrast. The metal housing protects the glass elements inside really well and even after 50 years the mechanics still function properly.
I love the Super Multi Coated Takumar lenses on my Asahi Optics Pentax Spotmatic SP1000, but these lenses also perform great on modern DSLRs and even cinema cameras. For use in videography, I decided to 'Cinemod' my Takumar set by adding M42 to Canon EF lens adapters (or any lens mount you prefer), 'declicking' the aperture, adding 3D printed seamless follow focus gears and adding equally sized step-up rings and lens hoods.
Requirements
To cinemod the Takumar lenses, you will need:
- Rear lens adapters (M42 to Canon EF for example);
- Rear lens caps;
- Step-up rings and screw-in lens hoods;
- (3D printed) seamless follow focus gears.
To disassemble the Takumar lenses, you will need the following tools:
- Sticky tape
- A lens cap that's slightly smaller than the front diameter;
- A 1mm flat head screwdriver;
- A 1.5mm flat head scredriver;
- A PH000 Philips Head screwdriver;
- Grease;
- A camera to test the lens on during reassembly.
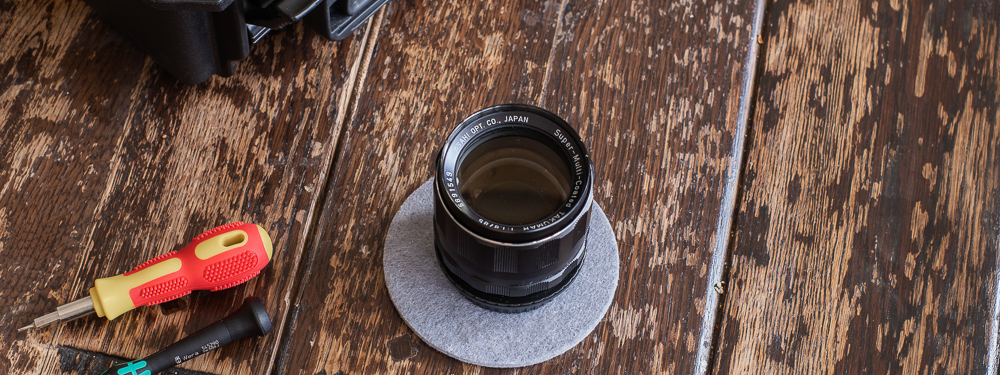
The required tools to disassemble and modify a Asahi Optics Super Multi Coated Takumar lens.
Declicking the Aperture
Takumar lenses are well designed and quite easy to disassemble and reassemble. I'm always pleasantly surprised by their logical, unsophisitcated construction and build quality. During disassemby, modding and reassembly, the glass elements stay grouped and intact at all times. So: don't just start taking apart the glass elements, as this is not necessary.
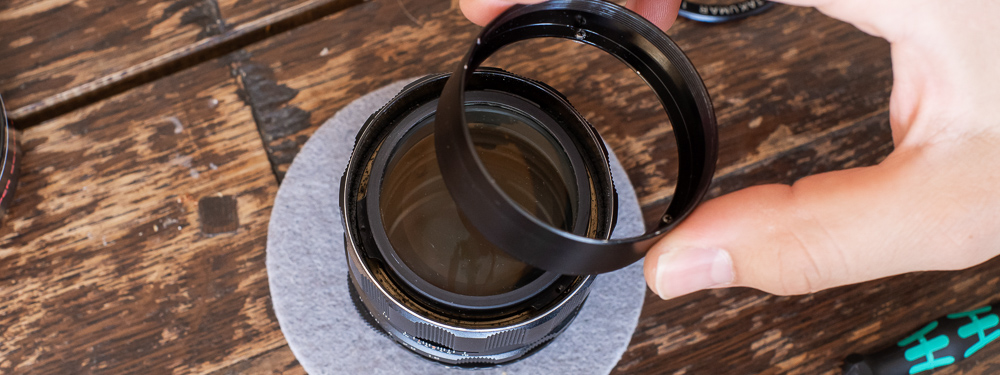
Step 01. The first step is to remove the ring on the front of the lens. It is screwed in quite tight, but after the initial release it comes out quite easily. Apply some double sided tape to the ring to get a grip, while using a lens cap (or similar item that grips to the ring, but does not touch the glass) to remove the ring by rotating counter clockwise.

Apply some sticky tape to the front ring.
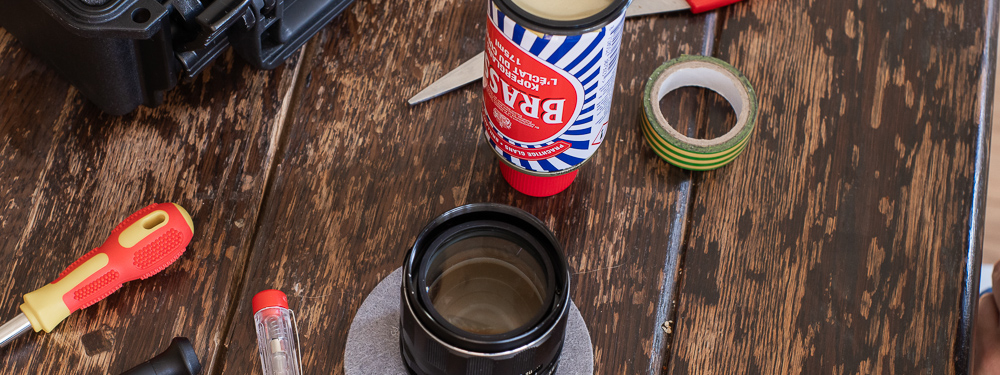
Remove the front ring using a can or similar sized item.
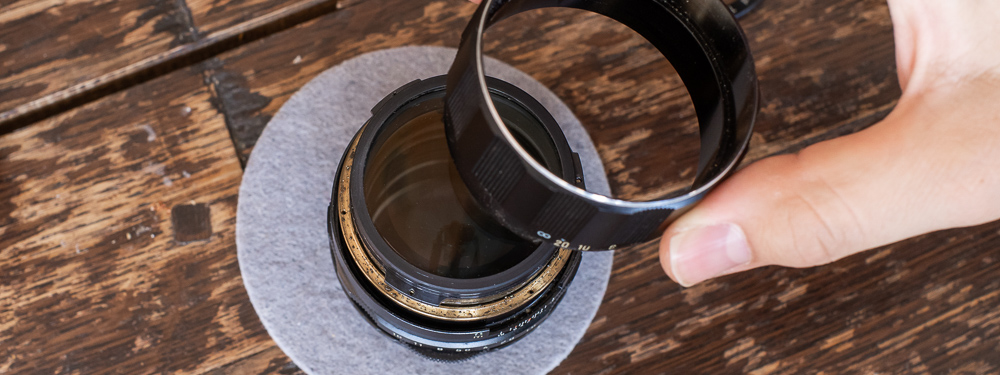
Step 02. After the front ring is removed, a set of three tiny screws is uncovered. These screws hold the front outer part of the lens in place. Remove the screws and when all are done, remove the front lens part.

Remove the screws that hold the front part.
Keep the screws aside and remove the front part.
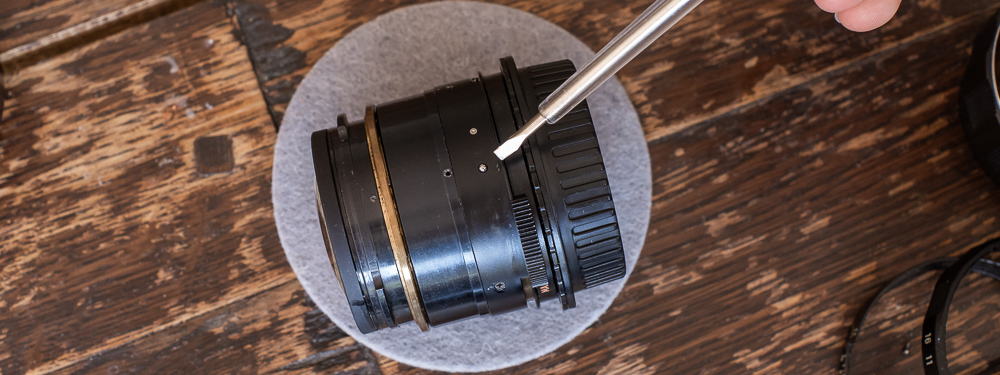
Step 03. After the front part is removed, the next set of tiny screws is uncovered. These screws connect the focus ring to the actual focusing heliocoid inside. The focusing heliocoid does not have hard stops for close and infinity focus, which means you will need to set infinity focus again upon reassembling the lens. Remove the three screws and their rings and remove the focus ring.
Step 03b. In some lenses, like the Super Multi Coated Takumar 28mm f/3.5, at this point another set of screws has to be removed. These screws attach the glass elements to the focusing heliocoid. Once these screws are removed, the glass elements can be lifted out as one piece, all at once.
Remove the screws, set aside at a safe place.
Removing the focusring of the Super Multicoated Takumar 85mm f/1.8 lens.
Step 04. Now it's time to remove the outer part with the numbers / scales, indicating focus and aperture. This step is tricky, as the ring is held in place by three tiny flat head screws. You will need a a flat head screwdriver of 1mm to loosen them. Unscrew these screws, but don't take them out completely, as it's very difficult to get them back in and the screws are easily ruined. When they are loose enough, the ring with the numbers will be removable. Depending on the lens you're working on, just slide it up - or remove it and set it apart.
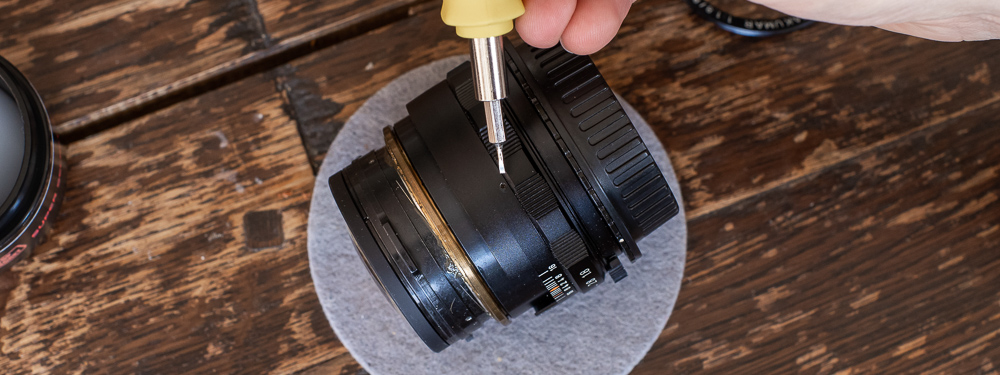
One of three tiny screws keeping the outer ring with numbers / scales in place.
On some lenses there is an extra screw to prevent the aperture ring from moving up. Remove that screw first, then lift the aperture ring.
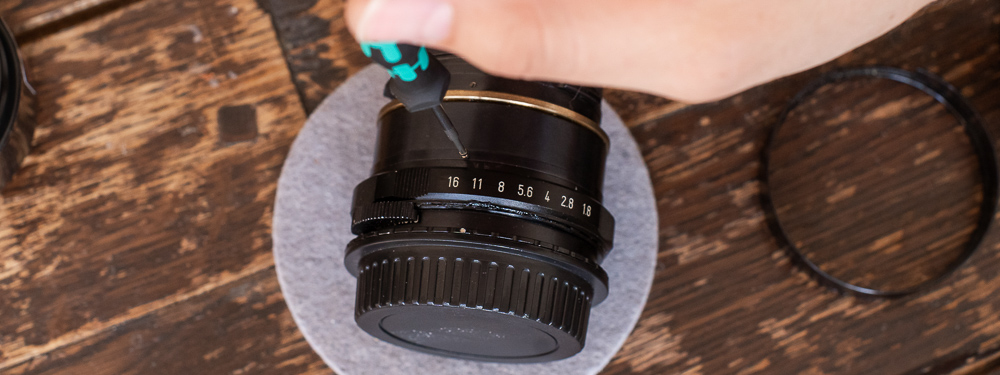
The extra screw keeping the aperture ring from moving.
Step 05. Now is also a good time to clean the lens a little bit, if necessary. The removed parts can easily be cleansed with a napkin, the lens itself by using a cotton pad or cotton bud.
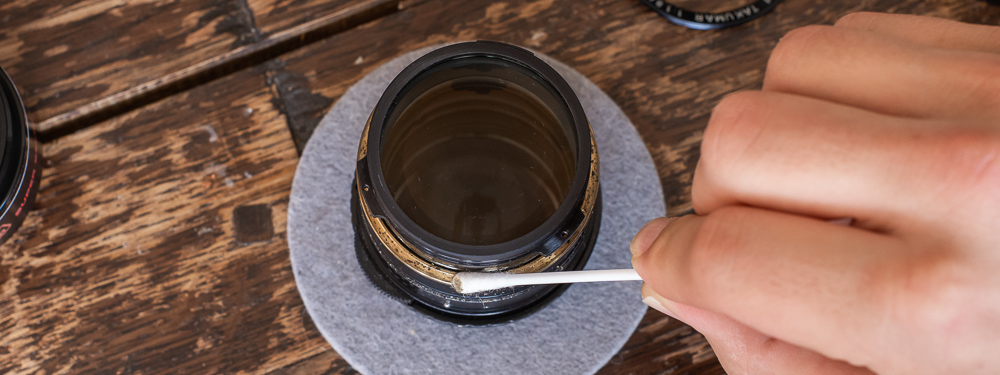
Cleaning the lens with a cotton bud.
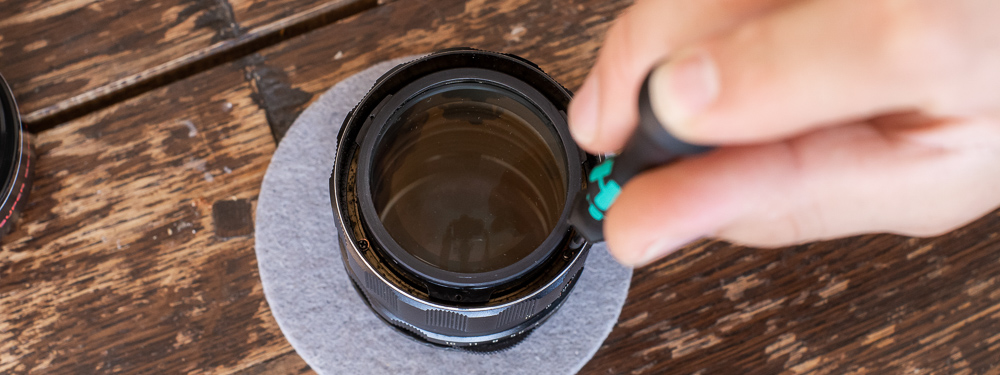
Step 06. When the final outer ring has been removed, the aperture ring can be removed. This uncovers the tiny ball that is used to 'click' the aperture. A nice function for photo, but not so much for video. Remove the ball and store it in small zip-lock bag, in case you want to undo the lens modification.
Remove this tiny ball, but keep this in case you want to reverse the lens mod.
Step 07. Now that the aperture is declicked, some grease needs to be applied in order to give the aperture ring some resistance, keeping the aperture ring from turning by itself. Apply a 1mm thick layer of grease all around the lens barrel where the aperture ring is located. It's better to apply some more grease, as excess grease can easily be removed later.
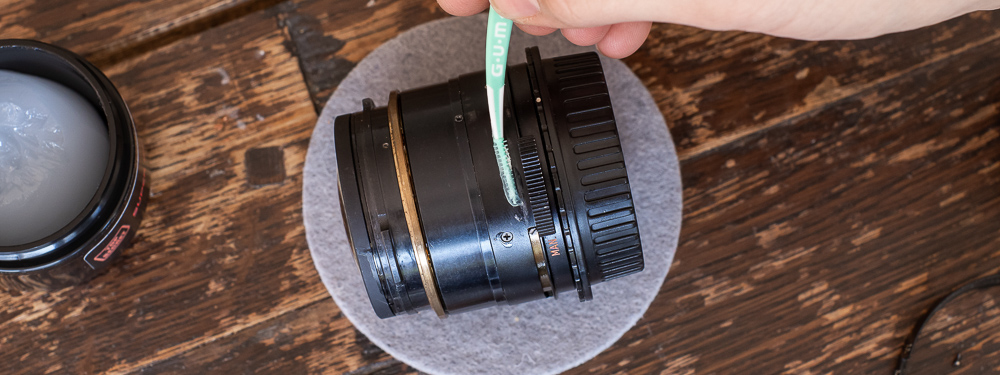
Applying grease using a toothpick.
Step 08. Finally, reassemble the lens. Start with putting the aperture ring back in position, followed by the outer ring with the numbers (and its tiny screws). To put the ring with the numbers/scale correctly, just fully close or fully open the aperture and align the middle 'needle' on the scale with the current aperture.

Reassemble the lens.
Then, place the focusing ring and attach it to the focusing heliocoid using the three small screws and their rings. Now comes a very important step: properly setting infinity focus. The focusing ring falls inbetween two screws on the metal housing, these are the hard stops for close focus and infinity focus. I usually mount the lens on my Pentax camera and focus to infinity, after which I put the focusing ring to infinity after which I tighten the screws. This is an important step, as you can't fix this in the field without disassembling the lens using tiny tools.

Further reassembly.
Once infinity focus has been restored, it's time to re-install the front part, and finally the front ring.
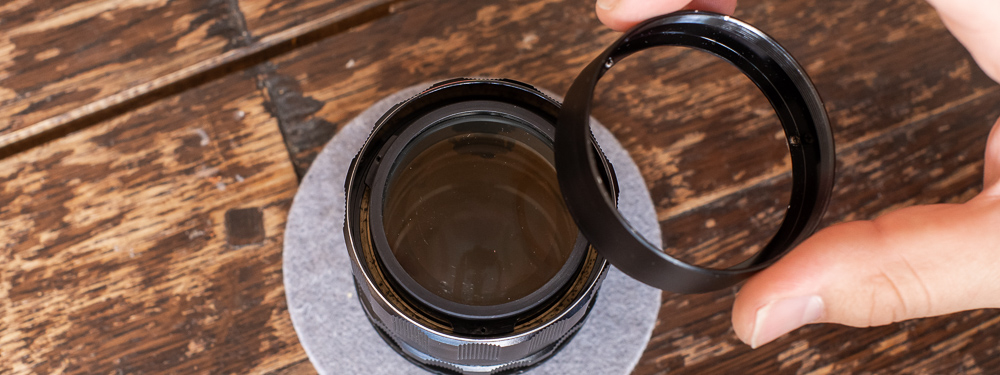
Reassemble the front filter ring.
All back to its original state.
3D printed focus gears
I designed a set of seamless focusgears for the Takumar lenses in my kit. The gears have a 0.8 pitch, which is the proper size for use with (wireless) follow focus set-ups. I decided the outer diameter of the focus gears to be 72mm, slightly bigger than the lens mounts but slightly smaller than the fronts. This way all lenses have roughly the same dimensions, which makes it easier to store them and swap them on set.
The following dimensions are for gears around the focus ring.
| Lens | Inner Diameter | Outer Diameter | |
| SMC Takumar 20mm f/4.5 | 61mm | 72mm | Download .STL |
| SMC Takumar 28mm f/3.5 | 61mm | 72mm | Download .STL |
| SMC Takumar 35mm f/3.5 | 56mm | 72mm | Download .STL |
| SMC Takumar 50mm f/1.4 | 59mm | 72mm | Download .STL |
| SMC Takumar 85mm f/1.8 | 64mm | 72mm | Download .STL |
| SMC Takumar 135mm f/2.5 | 65mm | 72mm | Download .STL |
The following dimensions are for the gears around the aperture ring.
| Lens | Inner Diameter | Outer Diameter | |
| SMC Takumar 20mm f/4.5 | 63mm | 72mm | Download .STL |
| SMC Takumar 28mm f/3.5 | 58mm | 72mm | Download .STL |
| SMC Takumar 35mm f/3.5 | 58mm | 72mm | Download .STL |
| SMC Takumar 50mm f/1.4 | 61mm | 72mm | Download .STL |
| SMC Takumar 85mm f/1.8 | 64mm | 72mm | Download .STL |
| SMC Takumar 135mm f/2.5 | 67mm | 72mm | Download .STL |
The diameter of the gears is about 0.1mm smaller than the actual diameter of the lens, to make sure they don't slip or come off completely. To install the follow focus gears, you will need a regular blowdryer (like a hairdryer) to heat up the gears, so they become flexible and expand a little bit. Gently heat the focus gears with a blowdryer, be careful not to heat them too much as they will become very flexible and lose their shape. Once the gears are warm enough, you will notice they are flexible, at which point you can quickly slide them around the lens. Make sure to install them properly and keep them straight. Once the installed gears cool down they will tighten and fit nicely around the lensbarrel.
I have to admit that the aperture gears are quite small / thin, so after a while they slip off more easily. Also, they don't necessarily offer a bigger advantage than to improve grip and outer diameter.
Rear lens adapters
I chose to convert the lenses to Canon EF mounts, as Canon EF is widely used in the industry, and Canon EF is often adapted to Sony and Micro Four Thirds cameras using other adapters and focal length reducers. These M42 to Canon EF adapters and Canon EF rear lens caps can be found on online stores for only a couple of dollars. I should mention that the aperture pin on some of the Super Multi Coated Takumar lenses make contact with some adapters, which causes the aperture to get stuck, or move very stiffly. So far I've only encountered this with the Super Multi Coated Takumar 50mm f/1.4 and the Super Multi Coated Takumar 85mm f/1.8. Take some sandpaper and sand away a millimeter or so on the inner part of the adapter ring. Now the aperture pin will move freely again.
Front Rings and Lens Hoods
Another advantage of the Takumar lenses is their size. They're small, so it's possible to use relatively small screw-on filters. I decided to use 67mm filters, to keep the lenses' size small, and 67mm is -just- a big enough size to cover the front of the Super Multi Coated Takumar 20mm f/4.5 without vignetting. Here's a list of the front filter thread sizes of different Takumar lenses:
| Super Multi Coated Takumar 20mm f/4.5 | 58mm front filter threads |
| Super Multi Coated Takumar 28mm f/3.5 | 58mm front filter threads |
| Super Multi Coated Takumar 35mm f/3.5 | 49mm front filter threads |
| Super Multi Coated Takumar 50mm f/1.4 | 49mm front filter threads |
| Super Multi Coated Takumar 85mm f/1.8 | 58mm front filter threads |
| Super Multi Coated Takumar 135mm f/2.5 | 58mm front filter threads |
After installing the front rings I decided to also add lens hoods. I chose the lens hoods made by Sensei, as they feature front filter threads. The 67mm lens hoods have 77mm front filter threads, which is the same size as my Contax Zeiss set, and my Anamorphic setup. This way I can share filters and matte boxes with all my lenses.
